Prompt
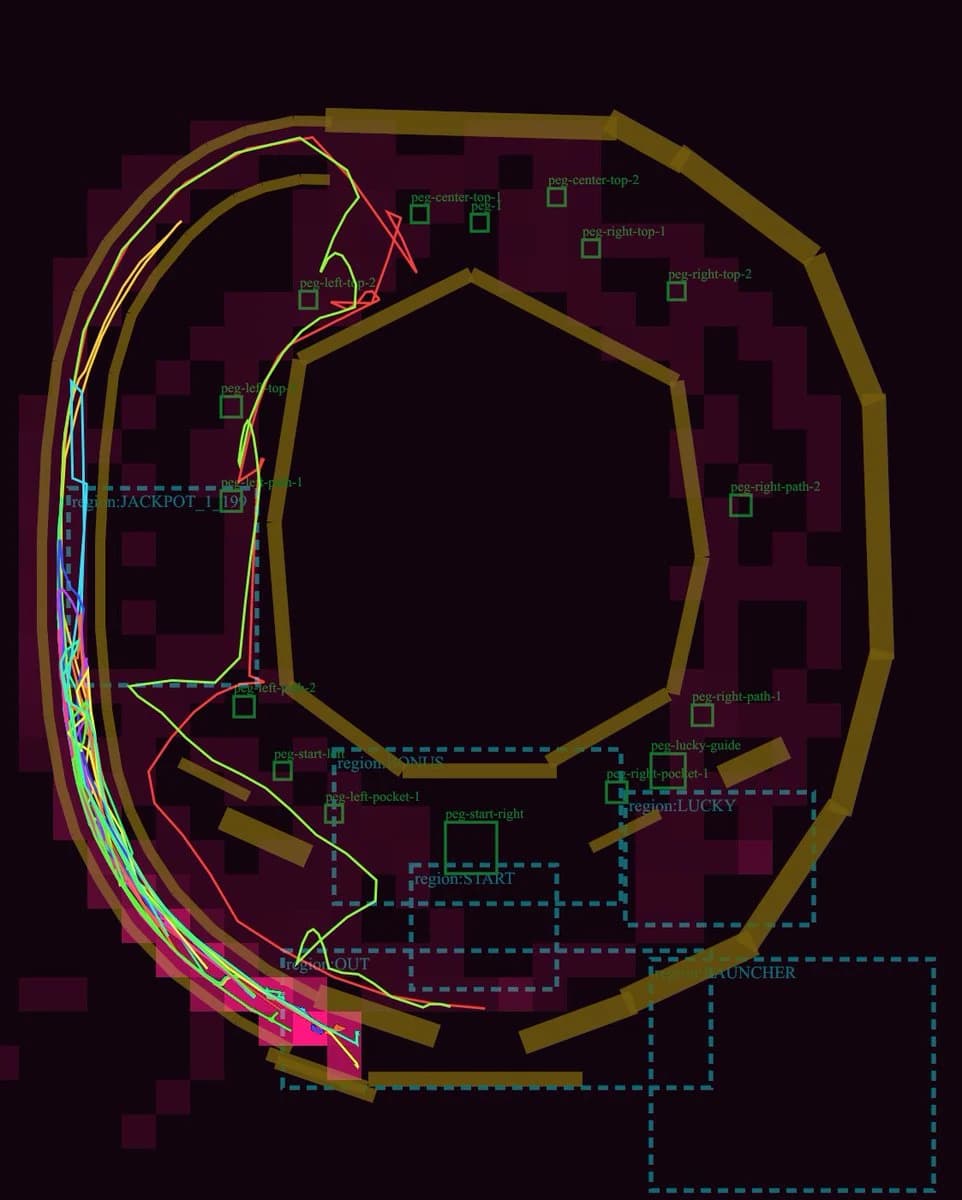
464 wordsGoal: Create a dark technical debug visualization of a pachinko machine playfield layout, showing ball lanes, collision rails, pegs, named gameplay regions, and simulated ball trajectories.
Canvas: Square-ish 4:5 technical diagram on a nearly black burgundy background, with a transparent-engineering-overlay feel. Use a dark maroon grid of blocky rectangular obstacle silhouettes behind the layout.
Main layout: Draw a large pachinko board occupying almost the full canvas. The board is formed by thick angular golden-brown rails: one large outer oval/octagonal loop around the perimeter, one large inner polygonal ring around an empty central dark void, and several short rail segments near the bottom and lower-right. Keep the rails chunky, beveled, and slightly translucent, like debug collision geometry.
Trajectory paths: Add exactly 5 thin neon ball-path traces over the rails and lanes: 1 cyan path hugging the far-left launch lane, 1 hot pink path weaving near the left edge and bottom exit, 1 lime green path that curves from the upper-left across the mid-left and down to the bottom, 1 red path that crosses sharply through the left-middle and upper-left, and 1 yellow path following the outer left arc. The paths should overlap and look like simulated pachinko ball travel, with sharp turns and curved segments.
Debug regions: Draw dashed cyan rectangular region boxes with small cyan labels. Include exactly 7 labeled regions: "region:JACKPOT_1" at left-middle, "region:STATIC" near the lower-left/middle, "region:START" centered lower-middle, "region:LUCKY" right-lower-middle, "region:LAUNCHER" bottom-right, "region:OUT" lower-left exit area, and one tall dashed launch/channel region along the left side.
Pegs and labels: Add exactly 15 small green square peg markers with green debug labels. Place them around the central playfield: 2 near the upper-left labeled "peg-left-top-1" and "peg-left-top-2"; 3 near the top center labeled "peg-center-top-1", "peg-center-top-2", and "peg-1"; 3 on the upper-right labeled "peg-right-top-1", "peg-right-top-2", and "peg-right-path-2"; 3 on the lower-right/lower-middle labeled "peg-right-path-1", "peg-lucky-guide", and "peg-right-pocket-1"; 4 in the lower-left/lower-middle labeled "peg-left-path-1", "peg-left-pocket-1", "peg-start-left", and "peg-start-right". Make labels small, thin, and green, as if from a game-engine editor overlay.
Additional details: Include one tiny cyan number box reading "19" near the left-middle jackpot area. Add a few small red guide triangles and line fragments near the top-left lane. The diagram should look like a GPT-generated game-layout review screenshot rather than polished UI art.
Visual style: Low-light debug render, dark maroon and black palette, golden collision rails, cyan dashed UI overlays, green peg annotations, neon trajectory lines. No photorealism, no characters, no real pachinko machine cabinet, no decorative anime art.
Customizable concept: Build the layout as a {argument name="machine type" default="pachinko"} physics debug map titled by implication around {argument name="gameplay focus" default="ball trajectory and lane review"}. Use rail color {argument name="rail color" default="muted golden brown"}, background color {argument name="background color" default="near-black burgundy"}, and trajectory colors {argument name="trajectory colors" default="cyan, hot pink, lime green, red, yellow"}.About this prompt
Pachinko Physics Debug Layout is a ready-to-use infographic prompt for GPT Image 2 on Image 2. Copy the 464 words below, paste them into the Create form, and you will get a result close to the preview above. Tweak the Infographic, Travel, 3D tag if you want to push it somewhere new.
Use it as a starting point and keep iterating: change the subject, lighting, or composition until it looks right. The credit cost stays the same whether you run it as-is or remix it.
Use case
A strong starting point for Infographic
Start here when you want a infographic image in the same direction as Pachinko Physics Debug Layout. The prompt already sets the look and structure; swap in your own subject, product, colors, or scene details for the brief you have in mind.
Easy places to tweak
- Subject Swap in your person, product, place, or object without changing the overall composition.
- Look and mood Tune the lighting, palette, camera angle, or materials so the image fits your brand.
- Final format Set the aspect ratio, background, text, or layout notes before you generate.
More prompt paths to explore
Find more GPT Image 2 prompts with a similar style, use case, or subject.
How to use it
- Step 1
Copy the prompt
Hit the Copy button above to grab the full text.
- Step 2
Open Image 2 Create
Head to the Create form and paste it in.
- Step 3
Generate
Hit Generate. Your version lands in seconds.
Make it yours
Load the prompt into the Create form with one click, then start tweaking.